Creating and Editing Import Specifications via the Wizard
For one-off text file data imports, it's hard to beat the simplicity of Microsoft Access's built-in wizard.


Importing data from text files is a common task in Access.
You may receive data in text format, such as comma-delimited (.csv) or tab-delimited (.tsv) files, that needs to be brought into your Access database. The Access import wizard provides an easy way to accomplish this.
In this post, I'll walk through the steps for importing a text file using the wizard, saving the import steps for reuse, and then importing via VBA code.
Importing Text Files: Step by Step
To demonstrate this concept, we will use a text file with AI-generated sample data: SeinfeldEpisodes.csv. Here's a brief preview of the data in the file:
"Title","AirDate","Description"
"The Soup Nazi","1995-11-02","Elaine annoys the Soup Nazi by not following his strict ordering procedure."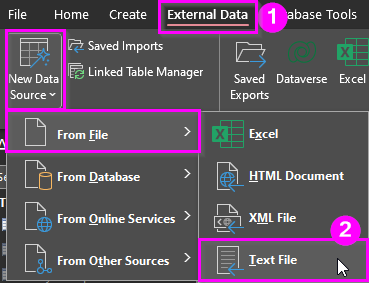
"The Hamptons","1994-05-12","The gang goes to the Hamptons to see a baby, but things don't go as planned."- Open the Access database and go to the External Data tab.
- Click New Data Source > From File > Text File
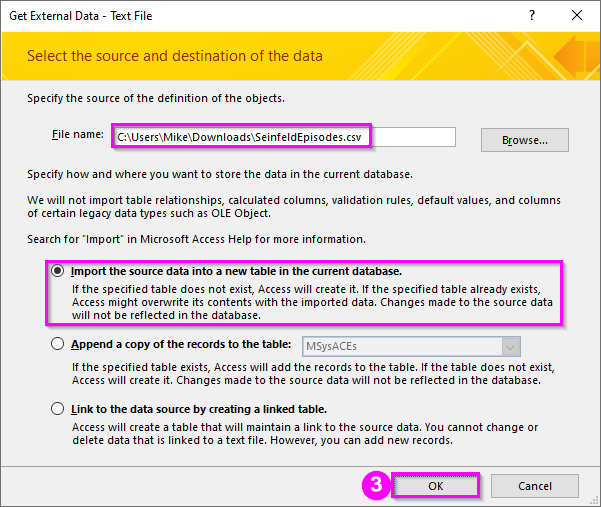
- In the Get External Data wizard, browse to and select the SeinfeldEpisodes.csv file. Leave the "(o) Import the source data into a new table in the current database" option selected and click [OK].
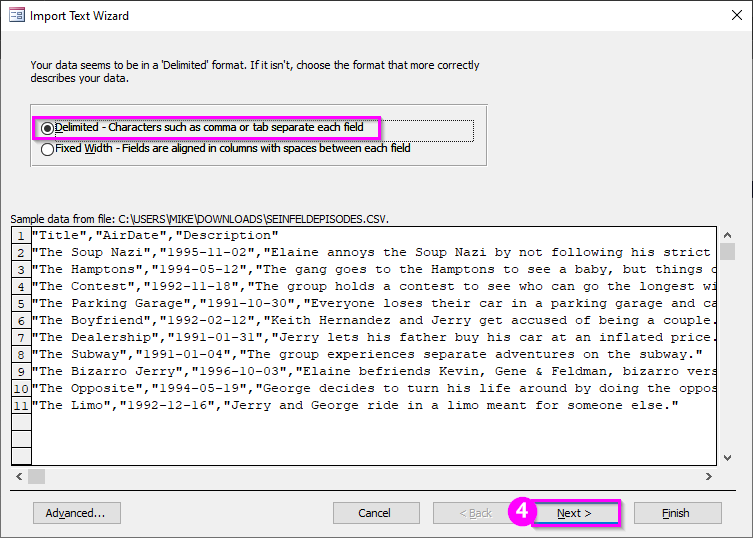
- In the next step, ensure the Delimited option is selected and click [Next >].
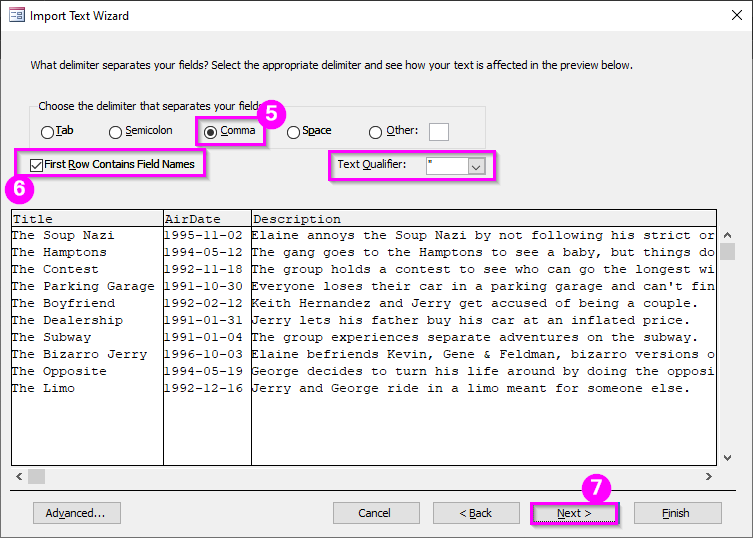
- Ensure the delimiter is set to "(o) Comma".
- Check the box to indicate the "[√] First Row Contains Field Names"
- Ensure the Text Qualifier is set to
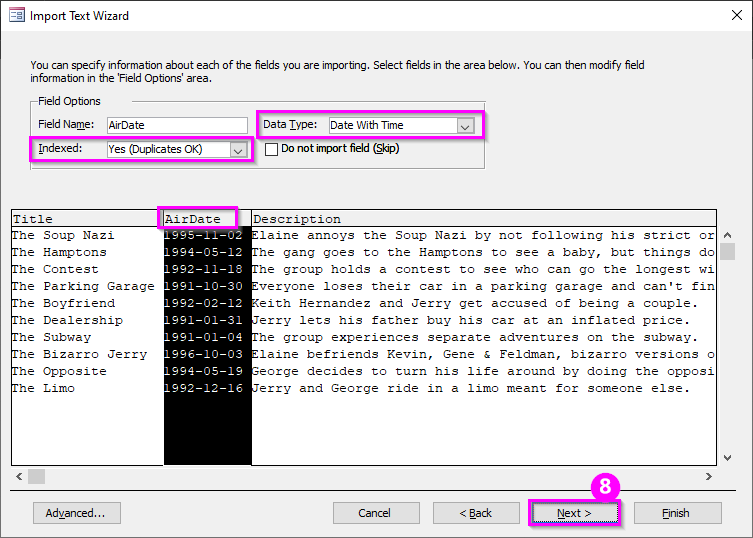
"(double quotes) then click [Next >]. - Select the "AirDate" column. Change the Data Type from "Short Text" to "Date With Time". Change Indexed from "No" to "Yes (Duplicates OK)" then click [Next >].
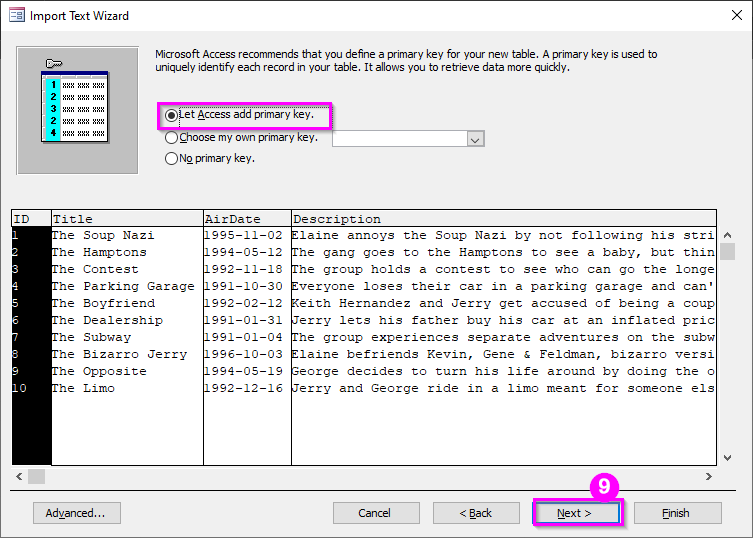
- Ensure the option to "(o) Let Access add primary key" is checked then press [Next >]. This will create an Autonumber primary key on the new table.
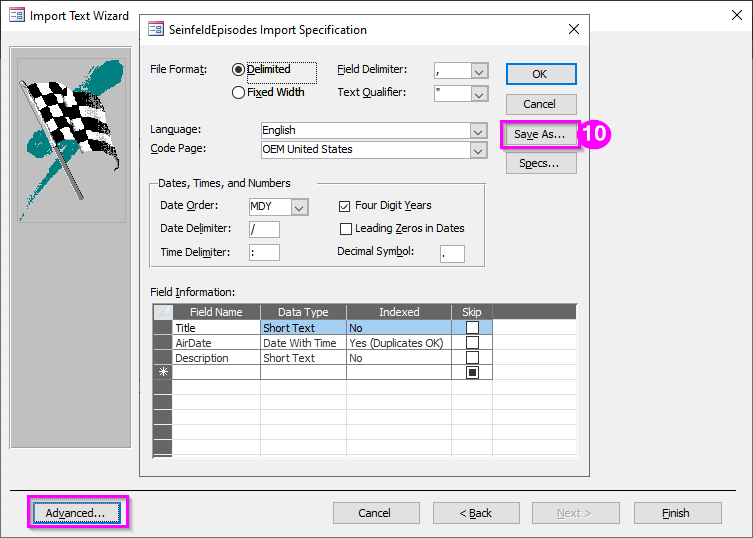
- Click the [Advanced...] button then [Save As...] to save the import steps.
- Name the specification "Seinfeld Episodes Import Spec" and click [OK] then [OK] to close the Import Spec dialog.
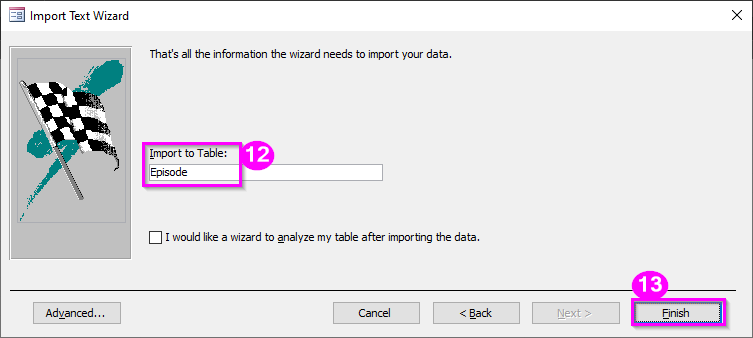
- Set the Import to Table value to "Episode". This will create a new local table named Episode when the data gets imported.
- Click Finish to complete the import process.
The data from SeinfeldEpisodes.csv will now be imported into a new table named "Episode" per the defined specification.
Screenshots
Here are the screenshots that correspond with the above numbered steps:

Dealing with Import Errors
If you followed the steps above to the letter, you should get the following message:
Finished importing file 'C:\Path\To\SeinfeldEpisodes.csv' to table 'Episode'. Not all of your data was successfully imported. Error descriptions with associated row numbers of bad records can be found in the Microsoft Access table 'SeinfeldEpisodes_ImportErrors'.
Here's what the first couple records of the Episode table looked like following the import:

The same import error occurred on all ten records. Here's an excerpt of the ImportErrors table showing the problem:
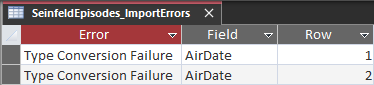
The problem appears to be the date format in our .csv file. Here are a couple of the values from our text file:
1995-11-021994-05-12
Note that these dates are in the unambiguous format "yyyy-mm-dd". However, this does not match the date format from our Import Spec (see screenshot of step 10 above).
We will need to change our saved import specification to deal with this problem.
Editing an Existing Import Specification
Unfortunately, there is no user interface in Access for this common use case.
Instead, we need to retrace our steps and go most of the way through the process of importing a text file so that we can gain access to the Import Spec to make changes to it. Here are the step-by-step instructions:
- Click New Data Source > From File > Text File
- In the Get External Data wizard, browse to and select the SeinfeldEpisodes.csv file. Leave the "(o) Import the source data into a new table in the current database" option selected and click [OK].
- In the next step, click [Advanced...] then [Specs...] then select "Seinfeld Episodes Import Spec" (saved earlier) then click [Open].
- Change the "Date Order" from "MDY" to "YMD" and change "Date Delimiter" from
/to-(NOTE: the "Dates, Times, and Numbers" settings apply to all fields in the specification, not just the currently selected one, so it's not possible to mix and match these settings within a specification) - To update the saved specification, click [Save As], verify the Specification Name is the same as before ("Seinfeld Episodes Import Spec") then click [OK] and [OK].
- Verify the delimiter is still set to "(o) Comma", the box is checked to indicate the "[√] First Row Contains Field Names", and the Text Qualifier is set to
"(double quotes) then click [Next >]. - Select the "AirDate" column. Change the Field Name from "AirDate" to "HallucinatedAirDate" to clarify that the AI was just making things up when it generated the episode air dates, then click [Next >].
- Ensure the option to "(o) Let Access add primary key" is checked then press [Next >]. As before, this will create an Autonumber primary key on the new table.
- Set the Import to Table value to "Episode". This will create a new local table named Episode when the data gets imported.
- Click [Finish] to complete the import process.
- Click [Yes] to overwrite our existing table named 'Episode'.
- Click [Yes] again to confirm we want to save our changes to the import spec.
This time was more successful, with Access presenting the following message following the import:
Finished importing file 'C:\Path\To\SeinfeldEpisodes.csv' to table 'Episode'.
Here is what the first few records look like in the Episode table now:

Using VBA to Simplify Repeated Imports
To import the text file using VBA, you can refer to the saved spec. Here is an example:
DoCmd.TransferText acImportDelim, "Seinfeld Episodes Import Spec", "Episode", "C:\Users\Mike\Downloads\SeinfeldEpisodes.csv"
Note that when importing via VBA, we do not have the option to overwrite an existing table. Rather, new records are always appended to existing tables. If we want to overwrite an existing table, we would need to manually delete it before performing the import. For example:
CurrentDB.TableDefs.Delete "Episode"
DoCmd.TransferText acImportDelim, "Seinfeld Episodes Import Spec", "Episode", "C:\Users\Mike\Downloads\SeinfeldEpisodes.csv"
By using the saved spec name, it will apply those field mappings and settings we set previously. This makes it easy to repeat the import without reconfiguring it each time.
Handling File Format Changes
If the text file format ever changes, you will need to modify the import spec.
Unfortunately, there is no way to edit a saved spec through the Access interface. The only option is to start a new import process using the wizard as we demonstrated earlier.
This is a royal pain.
You have to switch context from your VBA code into the wizard dialog. To make things worse, you can't even interact with your VBA project while the wizard is open because it is a dialog window. This makes modifying the spec more tedious than it should be.
Conclusion
In summary, the Text Import Wizard provides an easy way to bring text file data into Access.
Saving the spec lets you reuse the mappings. But changing an existing spec is cumbersome. You have to abandon your code and restart the wizard even to make minor changes.
There is another way that involves direct editing of system tables, but that is a topic for another day...
Acknowledgements
- Portions of this article's body generated with the help of Claude AI
- One or more code samples generated with the help of Claude AI
- Sample data generated with the help of Claude AI
- Cover image created with Microsoft Designer and StableDiffusionXL