Installing the Access Version Control Add-in: Step-by-Step
Looking to try version control with Microsoft Access? Start here by installing Adam Waller's free and open-source Version Control Addin for MS Access.

Step 1: Download the .accda File
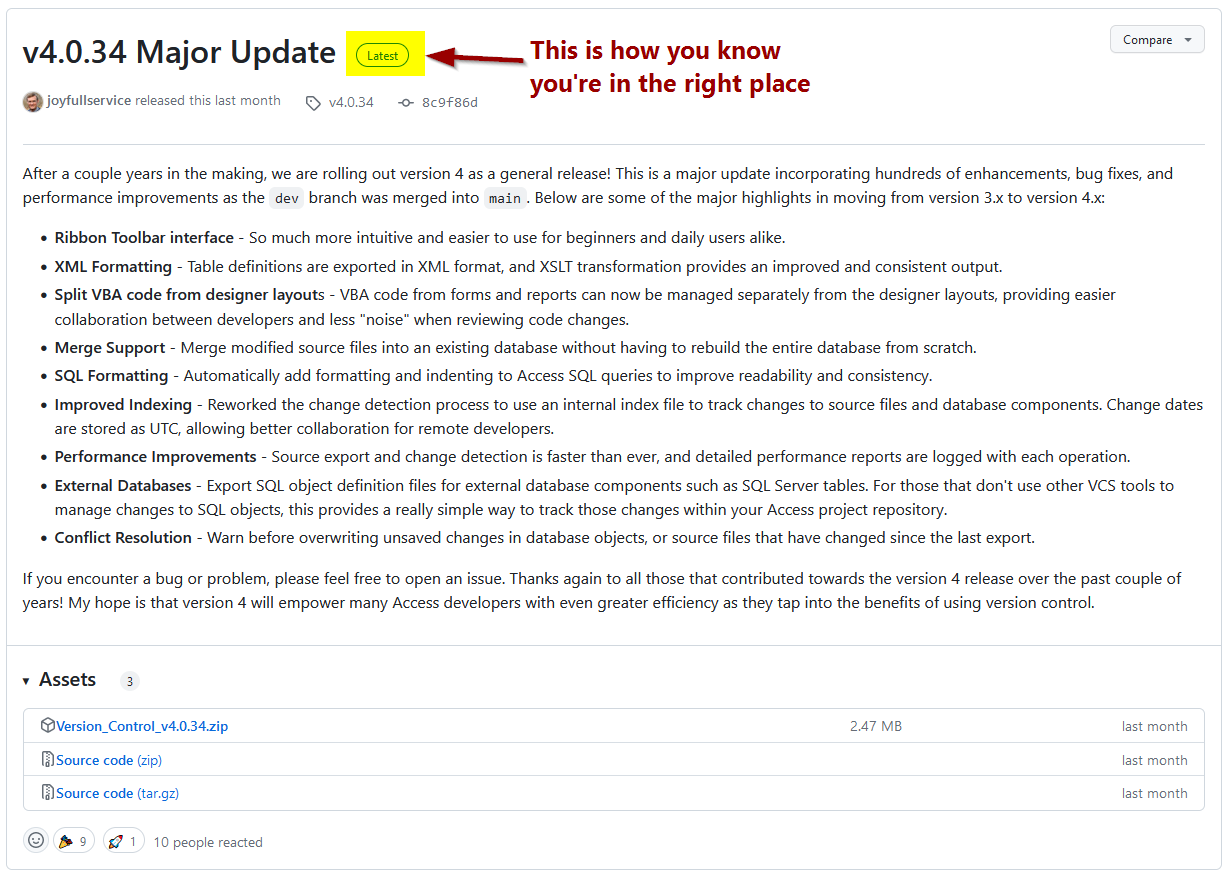
Permalink to Latest Release
Get the Latest Release for msaccess-vcs-addin from the following permalink: https://github.com/joyfullservice/msaccess-vcs-addin/releases/latest
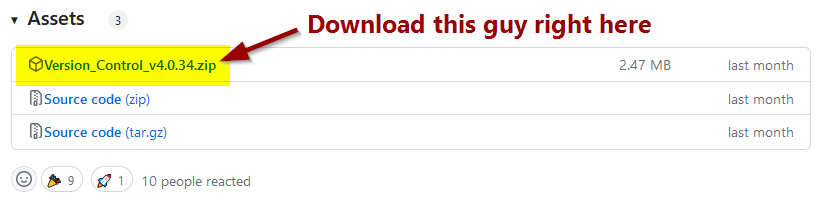
Download the Zip File
The only file you need is Version_Control_v4.x.yy.zip which you will find listed under the Assets heading underneath the release notes:
Unblock the Downloaded Zip File
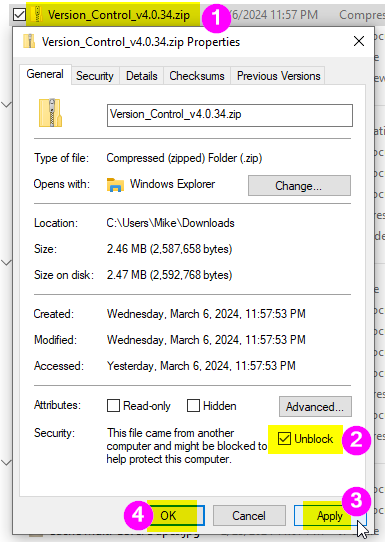
Remove the Mark of the Web from the downloaded zip file to avoid running into potential security roadblocks.
- Right-click the downloaded zip file and choose Properties
- Check the [√] Unblock check box
- Click [Apply]
- Click [OK]
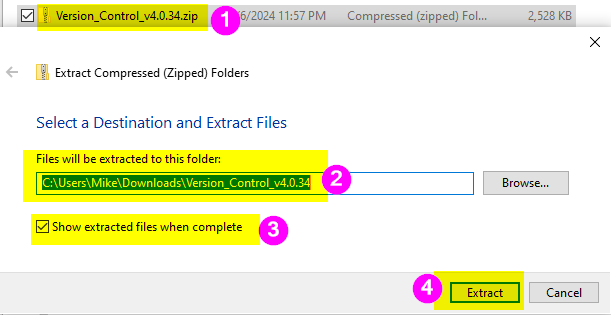
Extract the Zip File Contents
- Right-click the Zip file and choose "Extract All..."
- Accept the default destination (it does not matter where you extract the file)
- Leave the box checked to [√] Show extracted files when complete
- Click [Extract]
Step 2: Get to the Install Screen
Open Version Control.accda
If all went well in the above steps, you should now be looking at a folder with a single file in it named Version Control.accda. Note that you may not see the .accda filename extension depending on your Windows settings. If you would like to see the extension, check the appropriate box in the View tab of the File Explorer ribbon as highlighted below:

Double-click the Version Control.accda file to open it with Microsoft Access.
Ignore the Trust Center Warning
Unless you happened to extract the .accda file to one of your Trusted Locations, you will likely see the following error the first time you run the add-in:

Don't worry, the add-in is smart enough to handle this without you having to jump through any hoops. For now, just click [OK] so the add-in can finish opening.
Acknowledge that the "Add-in is not trusted"
When you see the message box below, do not panic. This is all to be expected.

Simply click [OK] to continue with the first-run process.
Allow the Embedded VBA Code to Run
Hey, look! It's the "Enable Content" button the last message box informed us to expect.

Click [Enable Content] to allow the embedded VBA code to run.
NOTE: If you skipped the earlier step of unblocking the zip file, you may see a red bar marked "SECURITY RISK" with only a [Learn More] button and no option to enable the content:

If you see this red banner, you'll need to close the application, right-click on Version Control.accda, check the [√] Unblock box as described above, restart Version Control.accda, and start paying attention to the directions from now on.
Step 3: Install the Add-in
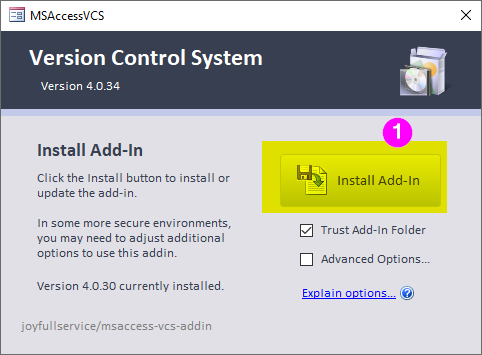
Install that Sucker!
Hit the big [Install Add-In] button:
Come on, you can do it! I know you can. Ah, who am I kidding? We both know you're not just going to click the big button. Not without first checking out the Advanced Options...
Advanced Options
It's killing you, right? Being a power user like me, you can't help yourself. You're not just going to perform a basic install without at least looking at what the Advanced Options are.
So, here you go. When you check the [Advanced Options...] button, this is what you see:
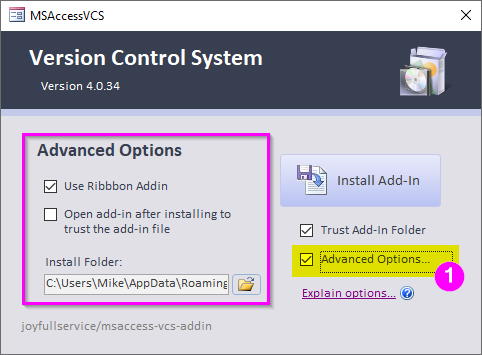
You can change the install folder, though I'm not sure why you would (unless you are in a particularly locked-down corporate environment where the default folder may not be available to you).
Here's the full path of my Install Folder (it got cut off in the screenshot):
C:\Users\Mike\AppData\Roaming\MSAccessVCSI also strongly recommend leaving the "[√] Use Ribbon Addin" option checked. This is one of the nicest new features that got added in version 4.
Finally, the "Explain options..." hyperlink just takes you to the project's Installation wiki page.
OK, are we good now? Finally ready to click that big button to install the add-in? Well, then, let 'er rip!
Celebrate🎉🥳
That's all there is to it! You are now one step closer on your journey to version control with Microsoft Access.
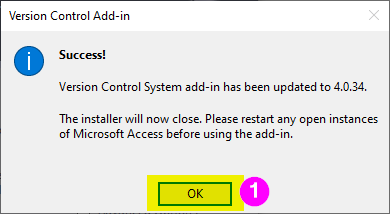
Click [OK] then close and reopen Access to see the Version Control add-in tab on the main Access ribbon.
Step 4: A VERY Brief Tour
We'll dive into the add-in properly in a series of future articles, but for now, here are some quick tips to get you going in the right direction.
The Version Control Ribbon Tab
The first time you open Access after installing the add-in, you will see a new tab in your Access ribbon named "Version Control."
- Click on the "Version Control" ribbon tab
- Click the Open Add-in ribbon button on the far left

Visit the Online Documentation
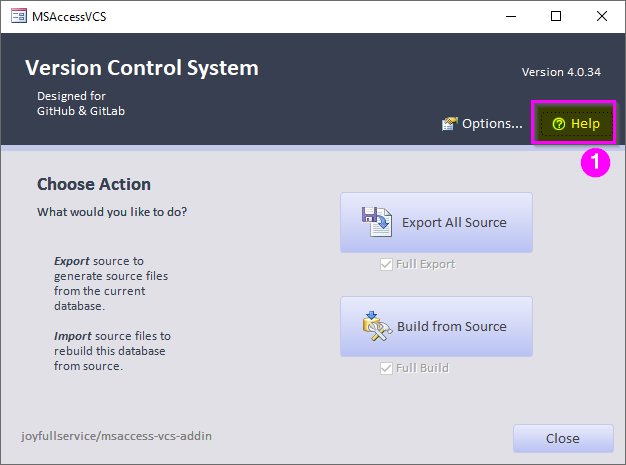
When you click the Open Add-in button, you see a form that was (I presume) the main way you interacted with MSAccessVCS in version 3 of the add-in. I've only ever used version 4, so I can't really comment on that.
In any event, the form that opens makes clear what the main functions of the add-in are, namely: Exporting to Source and Building from Source.
That said, the first button I recommend you click on is the Help button, which takes you to the project's online wiki documentation: